
Want to know the steps to repair corrupted RAW photos? Ruined pictures not opening up? Getting stressed out more and more? Don’t worry!
We’ve all been there – after a fantastic photography session, you transfer your RAW photos to your Windows computer with excitement, only to discover that some of them are corrupt and won’t open.
It’s a frustrating and disheartening experience to lose these pictures right after that amazing photoshoot and not even be able to see them. Especially for those who are absolutely clueless about the situation here.
But fear not! In this blog post, we’ll explore three reliable methods on how to recover corrupted RAW photos on Windows and get your precious shots back in perfect condition.
In case you are not able to understand if your files are corrupted or not, here are a few symptoms of the files that will help you understand:
- You cannot preview the RAW photos on your Windows PC or open them
- The file size is not normal for a RAW picture
- Few parts of the RAW pictures are blank or grayed out
- These pictures are showing up with weird colors or patterns
- The photos are blurry or pixelated
If any of the above is happening to your pictures, they are corrupted. Let’s check out the methods to repair them.
Methods to Repair Corrupted RAW Photos – Manual And Expert Techniques
There are a few methods that you can use to repair your files as we are going to explain in the sections below. However, the are a few workarounds for this issue that are given below:
- Open the Pictures or Another Device: Sometimes, there are issues with the device which is why you are not able to open these files. Before moving on to the methods, make sure you try to open these pictures on a different device and check if these are opening.
- Take Help from Advanced Image Editors: Before you learn how to recover corrupted RAW photos, use advanced image editors to open the files such as Photoshop, IrfanView, Lightroom, etc. These tools cover up a wide range of file formats and fix certain issues in your images.
- Try Out Noise Reduction Plugins: There are times when plugins can reduce the noise in your images. Try to use one of these plugins to fix your images; Noise Reduces Pro, Neat Image, Noise Ninja, Photo Ninja, etc.
If none of this works, move to the methods.
Method 1: Use a Specialized Software to Repair Your Files
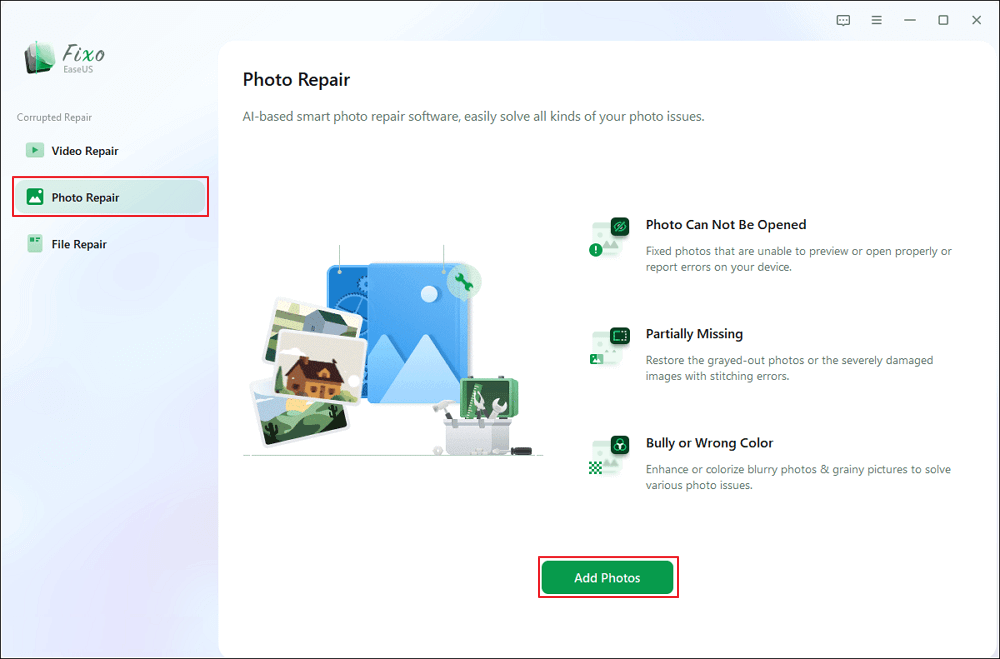
EaseUS Fixo Photo Repair.
1. Launch the tool on your computer and click on Photo Repair.
2. After that, choose the Add Photos option to select the pictures that you want to fix.
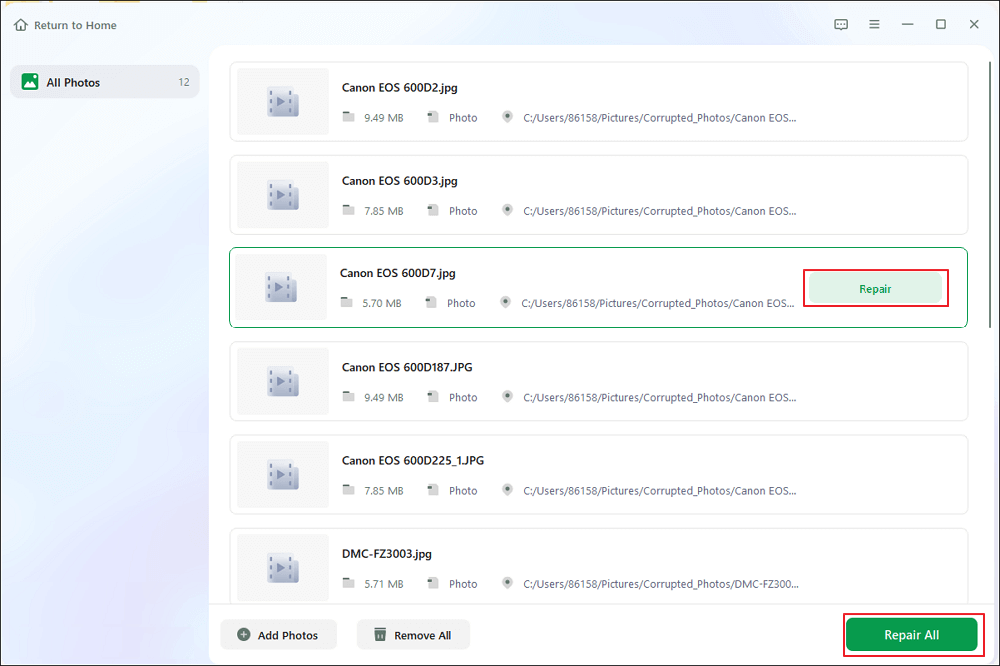
3. Now, choose Repair All or Repair as per desire and preview them.
4. When they’re looking good as new, click Save for the chosen photo.
5. Hit Save All.
6. To find your saved gems, click View Repaired.
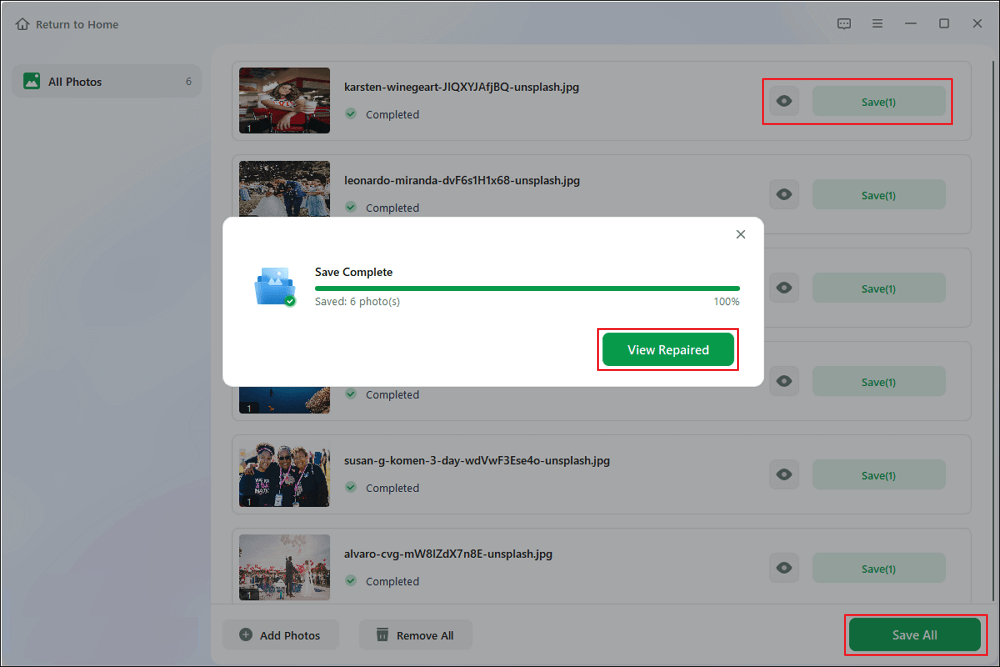
Your photos will be fixed and you can now open them on your computer.
Method 2: How to Recover Corrupted RAW Photos with Adobe DNG Converter
Adobe DNG Converter is a free tool provided by Adobe for converting RAW files into the Digital Negative (DNG) format. While its primary purpose is file conversion, it can also help repair your pictures in some cases. Here’s how you can use it:
- If you don’t already have it installed on your Windows PC, you can download Adobe DNG Converter from Adobe’s official website.
- Click on the Select Folder button and choose the folder containing your photos.
- Select the output folder where you want to save the files after recovering corrupted RAW photos.
- You can adjust the conversion options as needed.
- Click the Convert button to begin the conversion process.
- Once the conversion is complete, check the files.
- In some cases, this process can repair the corruption issues in your photos, making them accessible.
While Adobe DNG Converter is primarily a conversion tool, it can help recover some corrupt data files or image files by converting them to a different format. It’s worth a try if you’re facing corruption issues.
If not, you can try to use the next method for repairing the files.
Method 3: Manual Recovery and Editing to Repair Corrupted RAW Photos
If you prefer a hands-on approach and have some image editing skills, you can attempt manual recovery and editing to repair the files. Here’s a basic guide to get you started:
- Use your preferred image editing software (Adobe Photoshop) to open the corrupted photo.
- Create a duplicate layer of the photo to work on, preserving the original.
- Use the editing tools in your software to try and correct the issues with the photo. You can adjust brightness, contrast, color balance, and sharpness to improve the image and recover corrupted RAW photos.
- If there are specific areas of corruption, use the clone or patch tool to copy details from good areas of the photo and paste them over the corrupted parts.
- After you’ve made the necessary edits and improvements, save the edited photo in a format like JPEG or TIFF.
Manual recovery and editing require some skill and patience, and the success of this method may vary depending on the extent of corruption in your photos.
Final Verdict
Having corrupted pictures on your computer can be disheartening, but you can often rescue your valuable images with the right tools and techniques. Here, we have mentioned the best techniques to repair corrupted RAW photos which you can choose from and apply.
Whether you use specialized photo repair software or try at manual recovery and editing, these methods offer a path to restoring your cherished photographs. So, don’t let corrupted photos bring you down – get started on recovery and preserve your photographic memories!

Very interesting info!Perfect just what I was searching for!Raise your business
I love it when people come together and share opinions, great blog, keep it up.