
Summary: If you are looking for a user manual that explains how to create or add a signature in Gmail, you have landed in the right place. This article explains how to add or create a good-looking signature for your Gmail personal or work profile with various details such as text, images, business cards, logos, and images of your handwritten signature.
If you are someone new to the Google Mail (Gmail) application, please know that adding a signature to your outgoing email messages is a crucial component. A good-looking signature in Gmail at the bottom of the sent emails gives the message a professional look and makes it more valuable. Besides, details included in the signature allows users to communicate with recipient across various platforms.
Adding a signature to Gmail on a laptop or phone is a no-brainer and can be done within a few seconds. Below is the step-by-step tutorial to add or create a beautiful signature for your Gmail profile on desktop and mobile applications.
How to Create Signature in Gmail for Outgoing Messages on Desktop
- Login to your Gmail account.
- Click on to the gear icon as shown in the screenshot and select “See all settings” option.

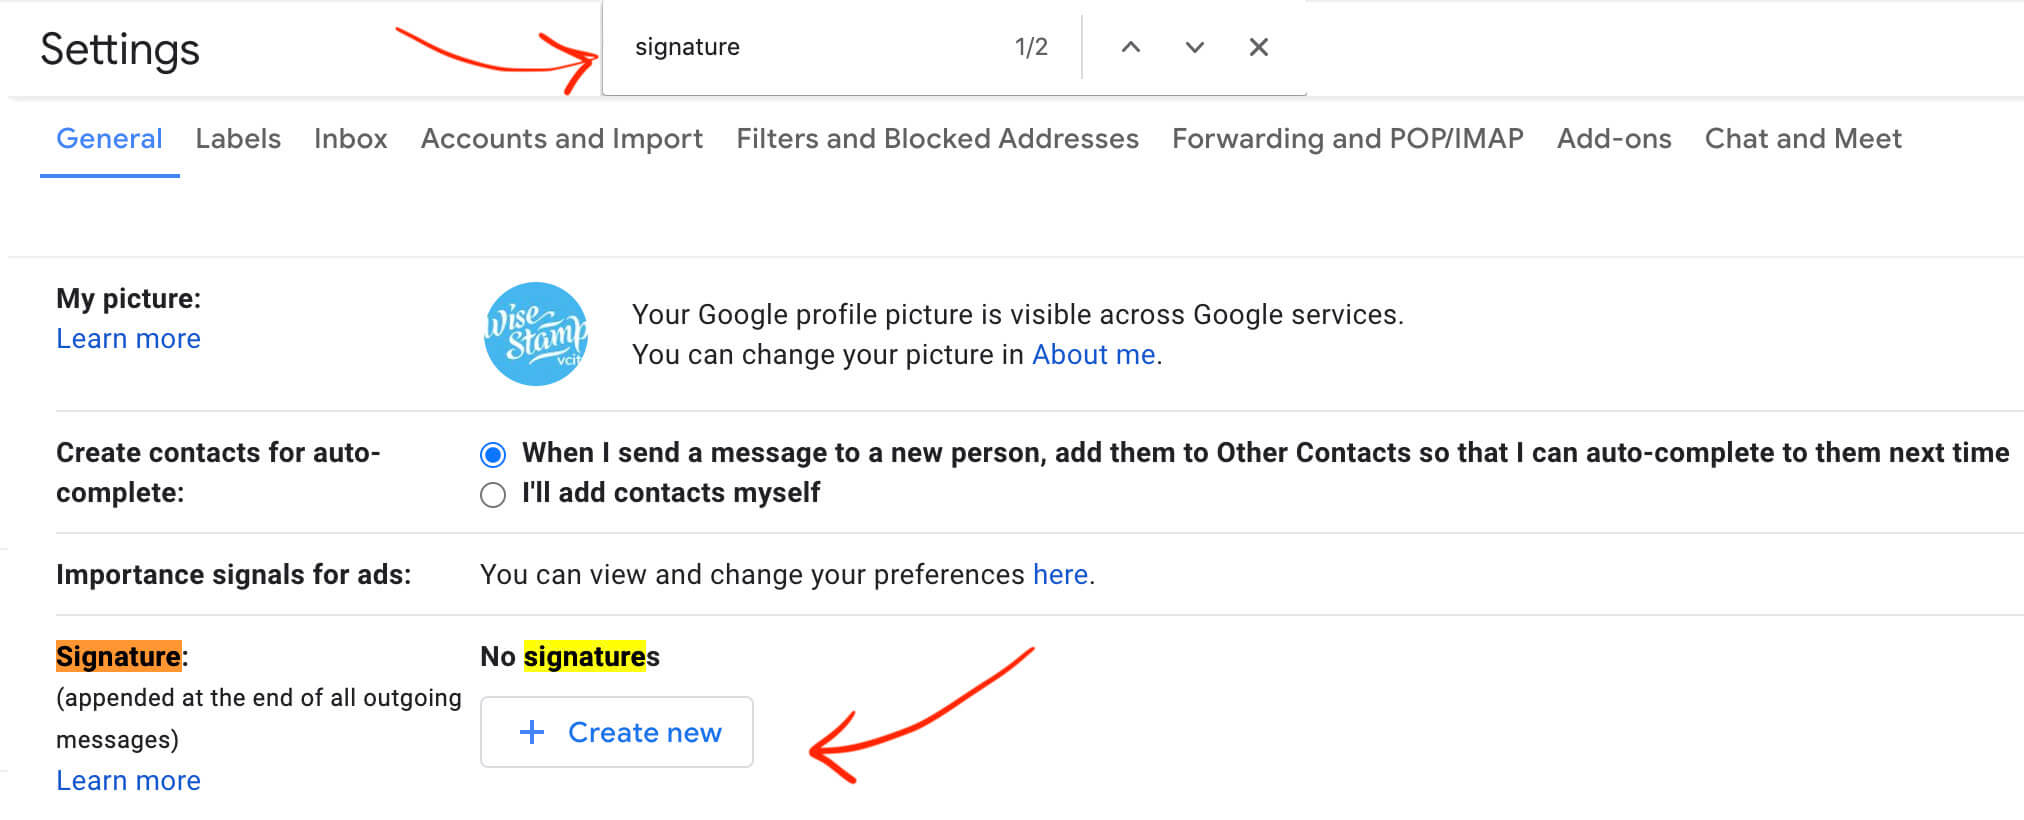
- Now, the setting screen appears with various functionalities. To search for the signature option across all capabilities, use Ctrl + F and type signature.
- Click on Create New and enter the signature name in the pop-up box as shown below and hit the Create button.
A Note for you: Please add the name that you want to create as a signature. In general, users add here their Full Name.
- Now, you can see the created name’s new signature. Next to it is a signature editor box with various options such as:

How to Add an Image in the Gmail Signature?
- Go to the Image icon in the signature text editor.
- If you have the image to upload on your computer, click on the Upload menu and choose, “select a file from your device.”
- Pick the image you want in your Gmail signature from your computer and upload it.
- You can also upload the image for your signature from Google Drive – Use the My Drive option.
- Click on the web address option to add a website URL, social media profile link, or any other link to Gmail signature.
- You can add information like an image, a logo, a social networking platform link, a phone number, an email address, your complete name, your job title, your company name, etc. using all of these possibilities.

- As seen in the image above, utilize underscore to break out the content. This makes the signature appear neat and accurate.
- After you’ve designed a professional signature that includes all the information you intended to include, select options under the two drop down menus labeled “For new emails use” and “on reply/forward use.”
- Select the required option and press the Save Changes button at the bottom of the page.

That’s it. Your beautiful signature is created. It will be reflected every time you will send an email from your Gmail account.
How to Insert Signature to Gmail on Phone App?
You have learned about the steps to add signature to Gmail from computer in the above section, now let’s continue with the steps to add a personalized signature to Gmail email on Mobile application. This can be completed in a matter of minutes.
- Open the Gmail app on your mobile phone.
- Next to the search field, select the icon with three horizontal lines.
- Choose Settings from the menu.
- Open the Signature settings option and enable the Mobile Signature option.
- This will open a text field where you can enter the signature for your Gmail emails.
- Click on the Save button to complete this process.
Also Read: A Step by Step Guide for Creating a Free Gmail Account
Steps to Create Multiple Signatures in Gmail
Users of Gmail or Google Workspace are free to design and control several signatures for use in Gmail’s outgoing emails. Take a look at the method discussed in the following section to create multiple signatures for your Gmail account.
- Go to the Signature options in the Settings window of your Gmail account.
- Here you will see an already created Gmail signature.
- Under that, click on the Create New button to create multiple signatures in Gmail account.
Conclusion
The aforementioned blog post has all the information that is required to create or add signatures to Gmail account. Now, you can easily add a professional signature at the bottom of each outgoing email from your Gmail profile. This guide also explained creating multiple signatures in your Gmail account.


I like this web blog very much, Its a rattling nice situation to read and get information.Blog monry